/White%20logos/Pivotel_CE_White.png?height=120&name=Pivotel_CE_White.png)
New to XGate? Stay connected by learning the basics of sending and receiving satellite email using the Xgate Android Mobile app
Once you have registered for a new XGate account, you can start sending and receiving emails over a satellite connection using the desktop software, Android mobile app, or Apple mobile app. This guide will walk you through the following procedures for the Android Mobile App:
-
Configuring First-Time Settings
-
Composing a New Email
-
Completing an Email Transfer Session
Tip: You can download the XGate software for Windows, Mac, Android and iOS devices from our website here.
Note: You can register for a paid XGate account or a free demo on our site here. Please contact us if you need assistance purchasing a new account license
Configuring First-Time Settings
-
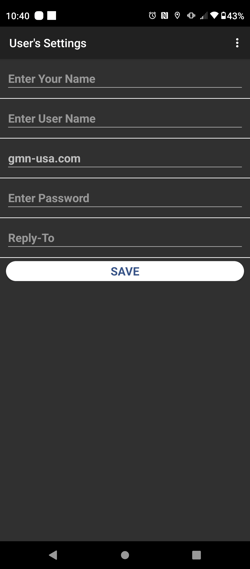
Sign into your account by navigating to Settings > User's Settings Window (This should be the first screen that launches upon starting the app for the first time.)
-
-
Enter your account credentials in theYour Name, User Name, and Password fields. Your credentials would have been given to you at the time of your account creation.
-
Click the white "SAVE" button
-
-
Configure the connection type by navigating to Settings > Connection (This should automatically launch after entering your credentials if it is the first time you've used the app.)

-
-
In the Connection Settings window, click the white, "AUTODETECT ROUTER" button.
-
This will start a scanning session. The XGate app will look for different routers/connection types, and once complete will have the correct one selected under "Select Router"
-
Network Connection is the most common choice here. It is used when connected to a home internet network or a satellite network where a manual data session is used.
-
-
Click the "SAVE" button to save these settings
-
Composing a New Email
-
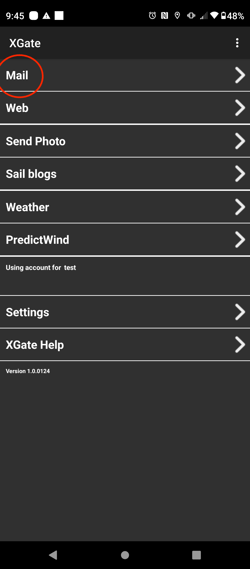
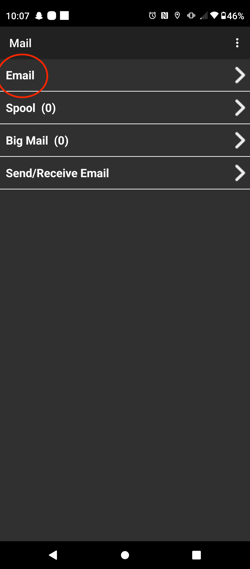
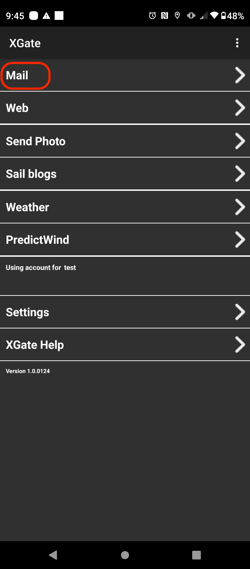
On the home page of the app, click the "Mail" section at the top of the screen. Then click "Email" at the top of the Mail screen. This will take you to the email client.
-
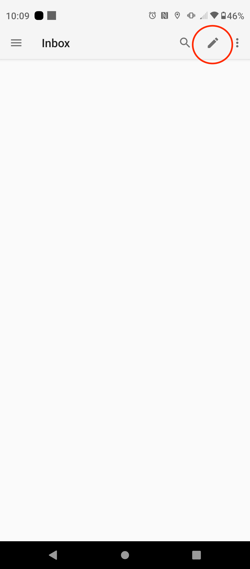
Click the pencil icon in the top right corner of the screen to start a new email message.
-
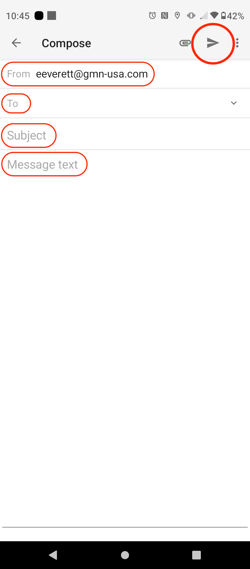
This will launch the Compose Message screen, where you will enter all details required for the new email message.
-
The "From" field will be automatically completed with your email address.
-
In the "To" field, enter the recipient's email address. Clicking the small down arrow in the right of the "To" field, will allow you to enter addresses in the "Cc" and "Bcc" fields.
-
-
-
In the "Subject" field, enter the subject of your email message
-
In the "Message Text", write the body of the email.
-
-
When you are satisfied with the Recipients, Subject, and Body of your email, click the Send Arrow icon in the top right corner of the screen. This will move your email to the Outbox, where it will stay until you start a data session and send it.
-
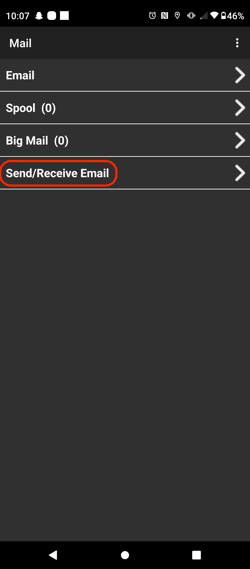
If you navigate to Mail > Spool, you should be able to see your pending outbound mail.
-
Completing an Email Transfer Session
To send and receive emails with XGate, you must complete a manual email transfer session. This allows you choose when you want XGate to connect to the internet, allowing you to better control your satellite airtime usage.
-
To start a manual email transfer session, navigate to Mail > Send/Receive Email.
-
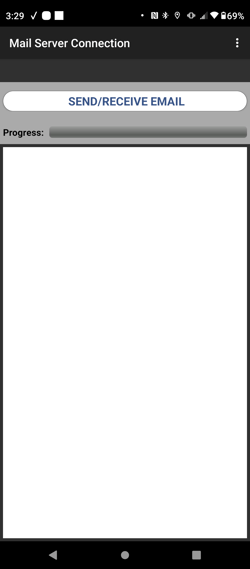
Click the SEND/RECEIVE EMAIL button.
-
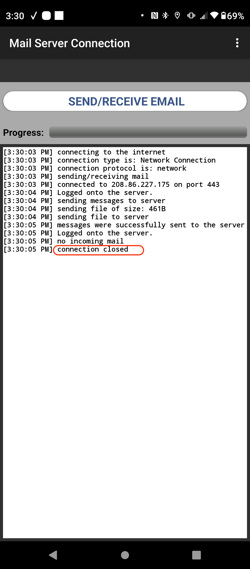
As the data session progresses, logs will generate in the Mail Transfer Window. These logs provide information on the status of the current email transfer session such as the number of emails, the size of the messages, and when the session is complete.
-
If there is an error in the transfer, an error message will appear here.
-
-
Once the session is complete, "connection closed" will be generated at the bottom. At this point any pending emails from the Outbox will be moved to the Sent folder, and newly downloaded emails be available to view in the Inbox.
Please Note: If any error messages are shown in the logs during your email transfer session, please check your account credentials, selected Connection Type and internet connection. Please contact us for further assistance.