/White%20logos/Pivotel_CE_White.png?height=120&name=Pivotel_CE_White.png)
Start managing your data usage by setting up a new Pulsar account.
Pulsar is an online satellite Internet data management tool. Within the portal users can set data limits and caps and configure when and where alert notifications are sent. These features provide the control to monitor monthly usage and prevent unintended overage charges.
Please Note: You will need access to your Pivotel account number and billing password to move forward with the account creation process. If you do not have this information, please reach out to Pivotel customer support for assistance.
Creating a New Administrator Account
-
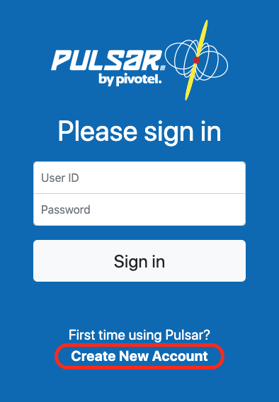
Navigate to the Pulsar login page here: https://auth.pivotel.com.au/pulsar4/
-
Click on ‘Create New Administrator’ at the bottom of the screen.
-
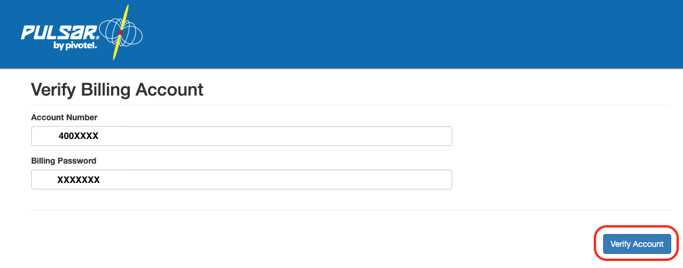
A new page will appear. Here, enter your Pivotel account number and password. These credentials are given to new customers when services are activated, and they are used to access SelfCare, the online billing platform.
-
Click ‘Verify Account’
-
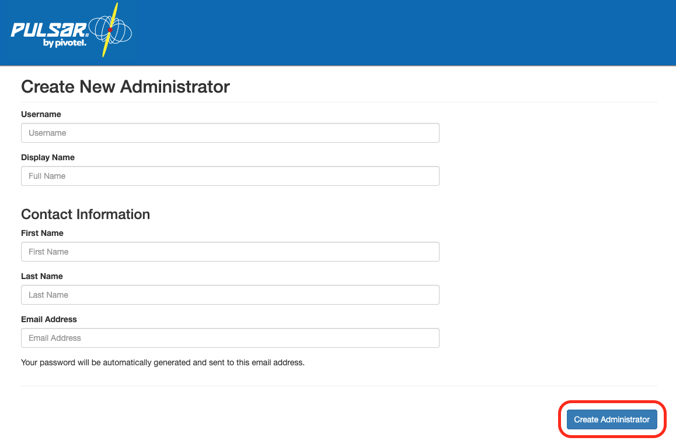
A new page will appear. Choose a new Username and Display Name for the account, and enter your contact information. The Username is used to log into Pulsar, and the Display Name will be displayed in the Pulsar portal.
-
Click ‘Create Administrator’, and a password will be sent to your Contact Email Address.
-
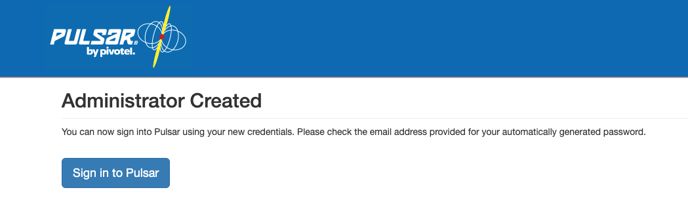
Click ‘Sign into Pulsar’ on the next screen.
-
The original login screen will appear. Now you can login with the username chosen and the password sent to your email. Click "Sign In" to complete the sign in process.
Changing the Account Password
-
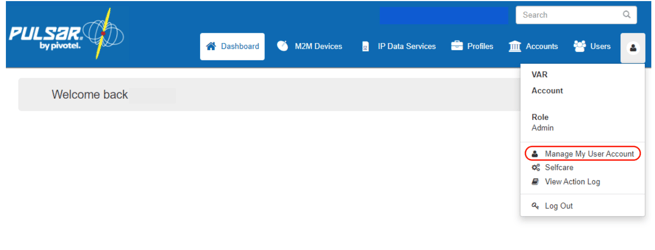
After logging in, you can change the account password by clicking on the profile icon in the top right of the screen and then selecting ‘Manage My User Account’
-
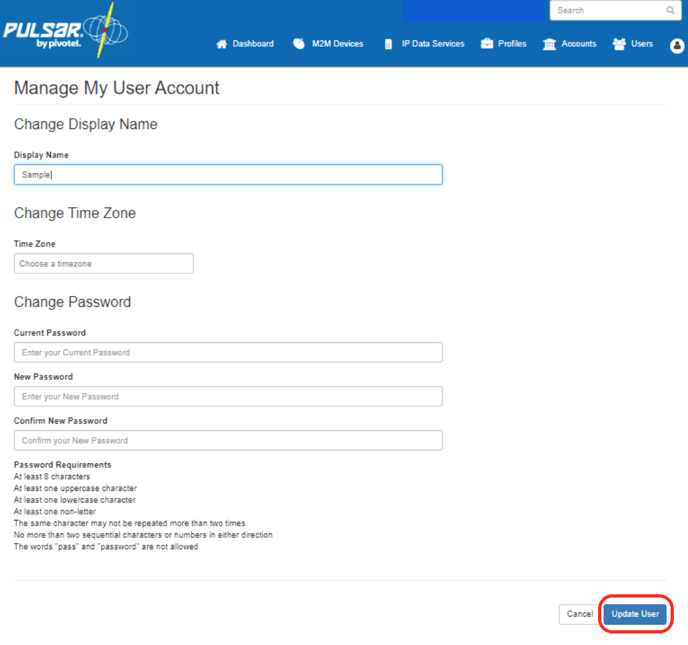
A new screen will appear. Under ‘Change Password’, enter the Password sent to your Contact Email Address in the ‘Current Password’, enter your new Password in ‘New Password’ and repeat your new Password in ‘Confirm New Password’. Click ‘Update User’ to save the changes.
-
Once the new Password is saved, you will return to the login page to login using the Username and new Password.
-
Now that your account has been created, the learn how to manage data usage with Device Profiles. See the next article, Pulsar: How to Create and Manage Device Profiles.
Learn More about Using Pulsar with these Quickstart Guides
Pulsar Quickstart for Inmarsat Fleet One, Inmarsat BGAN M2M, Iridium Certus and Thuraya